

Event block settings
It is possible to add an event to a course page. The event can include one or more timing.

In the event block settings you can add block header, description, style on the page, and event type. If the course passing criteria includes mandatory assignments, the block can be set as mandatory in additional settings. If participants can get their attendance marked, this can also be enabled in the block settings.
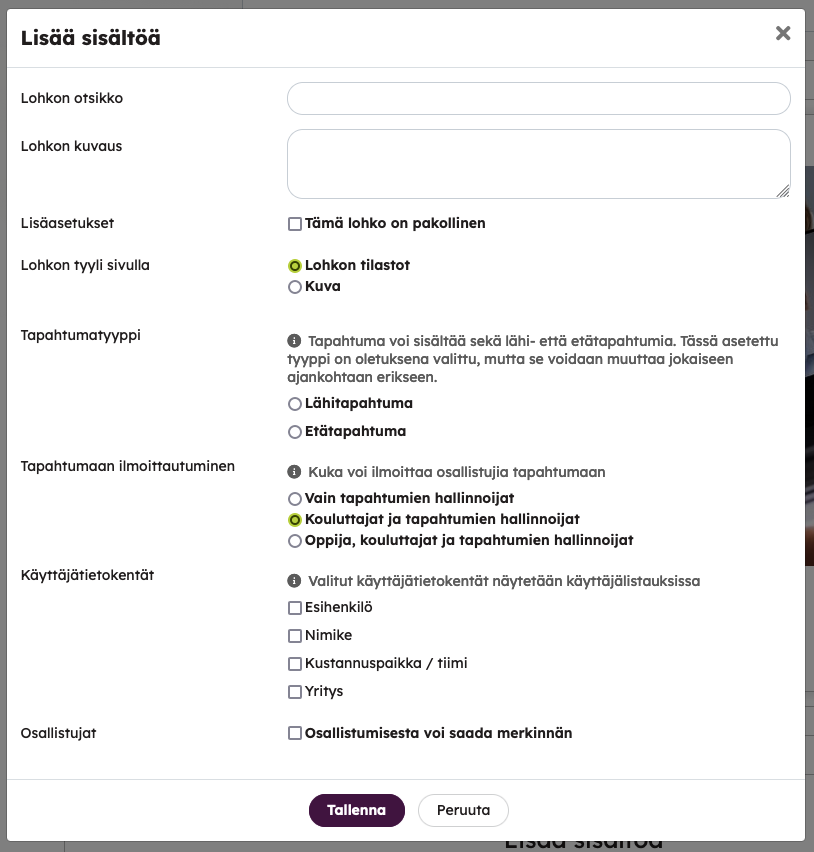
After this, event session times and their information can be created. The event block can therefore have one or more event session times. Here it is good to note that if the block is mandatory, the learner can only participate in one event of the block and get a completion mark for it.
- Go to the course view and go to the page where the event block was created.
- Click the Open button in the event block.
- Click the Add new time button.
- Define the start and end time (date, time), select the event type (in person / virtual) and add other necessary information.
Please note that only those users who are already members of this course can be added as instructors to the event.


Cancelling event
If the time of the event session is cancelled, it is also possible to send a message to the participants connected to it. You can format the message yourself. The canceled event can either be removed from view when canceling, or you can choose to keep it visible, in which case the event will also appear crossed out for learners.
Deleting event time
There are two possible situations when deleting the time of the event:
- If there are no participants in the event, it is completely removed from everyone, so that it is not available in event reporting in administration either.
- If there are already participants in the event, the deletion will hide the event time from them, but the event will remain visible to the administrator as cancelled. In this way, the administrator can view e.g. participant information afterwards.
Adding participants to the event
The trainer or course administrators can add participants to an event on the course. A confirmation message about the participation can be sent to the participants.
In the settings, you can also choose to have the learner register for the event themselves. There can be several event times in one event block. Once a learner has signed up for one, he or she can no longer sign up for others. After registration, the learner can also cancel their registration if necessary. Registration is open until the start of the event.
Attendance
Attendance can be monitored at events. After the start of the event, the trainer can mark attendance information for the learners in the event. You can mark the attendance information by going to the event block in the course and pressing the Participants button and then selecting the Attendances view. After that, click on the desired event time and you will see the participants. Then you can mark them as present or absent. You can also set attendance for all participants at once.
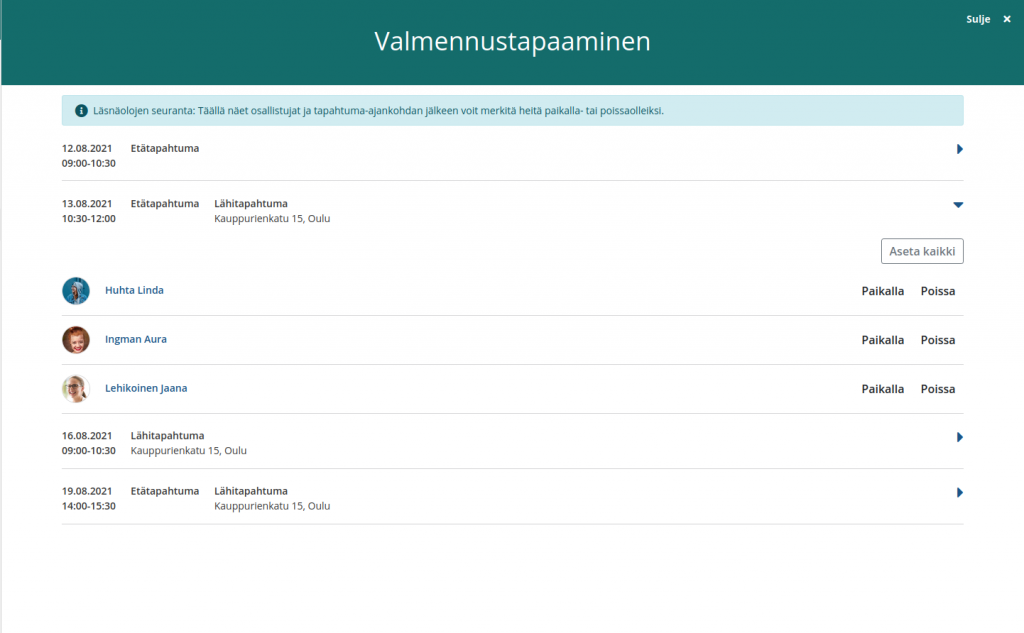
On the Events tab of the course, the learner can see information about whether they were marked to participate at a certain event time.
Hybrid event
If there is a possibility of both in person and remote participation in the same event, this can be taken into account when creating the event and its dates.
It is essential to consider whether a single participation limitation is needed for a hybrid event or whether a separate participant limitation is desired for in person and remote participation. If an event is a mandatory assignment, it is important to make the hybrid event specifically one event but on a case-by-case basis
Option 1: One event and one timing
- When creating an event, the primary setting for it is selected as in person/virtual..
- When creating an Implementation Date for an event, the possibility and information of both on-site and remote participation is added to it.
In this option, participants are added to a single event time that can be attended on-site or remotely. Participants cannot choose the method of participation here, ie the organizer does not get a reading of how many would be participating on site or remotely. The participation limit is common to both methods of participation.
Option 2: One event and two timings
- When creating an event, the primary setting for it is selected as in person/virtual..
- Create separate times for in person participation and virtual participation, even though these coincide in time (same event).
In this option the participants are added or will join either to on-site event or virtual event, so that the organizer knows, how many people are participating in which way. Participant limitation can be set separately for on-site and virtual.
Downloading participant list
You can download a CSV file of the participants of the event. They can be downloaded from the course’s Events page or content pages, by opening the event block and its participants.
In the block settings, you can choose which user data fields you want to include in the file. (Those user data fields can be selected that do not have Restrict visibility only to administrators selected as a setting in environment management.)
Notifications of the event
There is an automatic reminder of the event the day before: Learners will receive an email when they are participating in an event.
A message will also be sent to the managers stating who is attending the next day’s events.
If you do not want to receive these notifications, you can edit your own settings in the Settings button in the upper right corner and choose not to want messages related to Events.
Calendar entry
The user can download a calendar entry from the event. It is good to note here that the text in the Description field of the event block is also transferred to Google and Microsoft calendars when the user uploads the event to their calendar.